ダウンロードとインストール
Visual Components ConnectorSoftware plugins, developed by RTR, that enables the export of projects from 3rd party simulation tools such as Process Simulate and Visual Components for use with Resolver. The Connector also enables... をダウンロードしてインストールし、Resolver を使い始めましょう。
ダウンロード
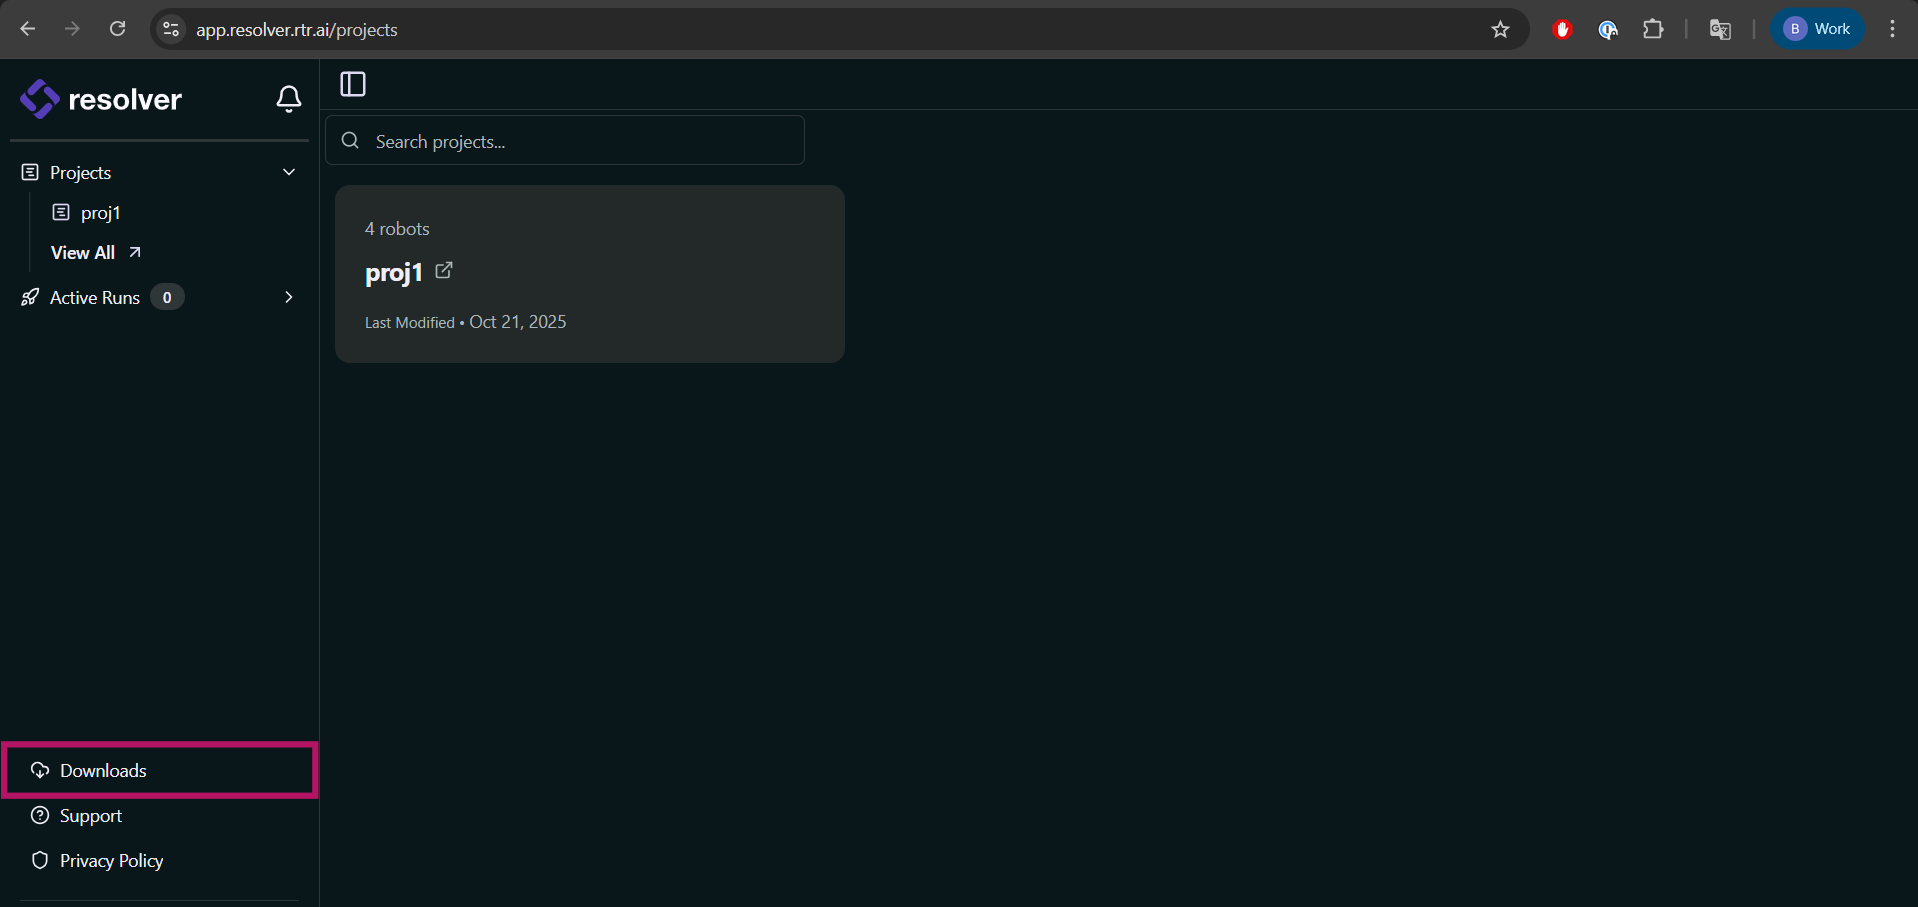
お使いの地域の Resolver ページにログインし、左下隅の Downloads をクリックします。
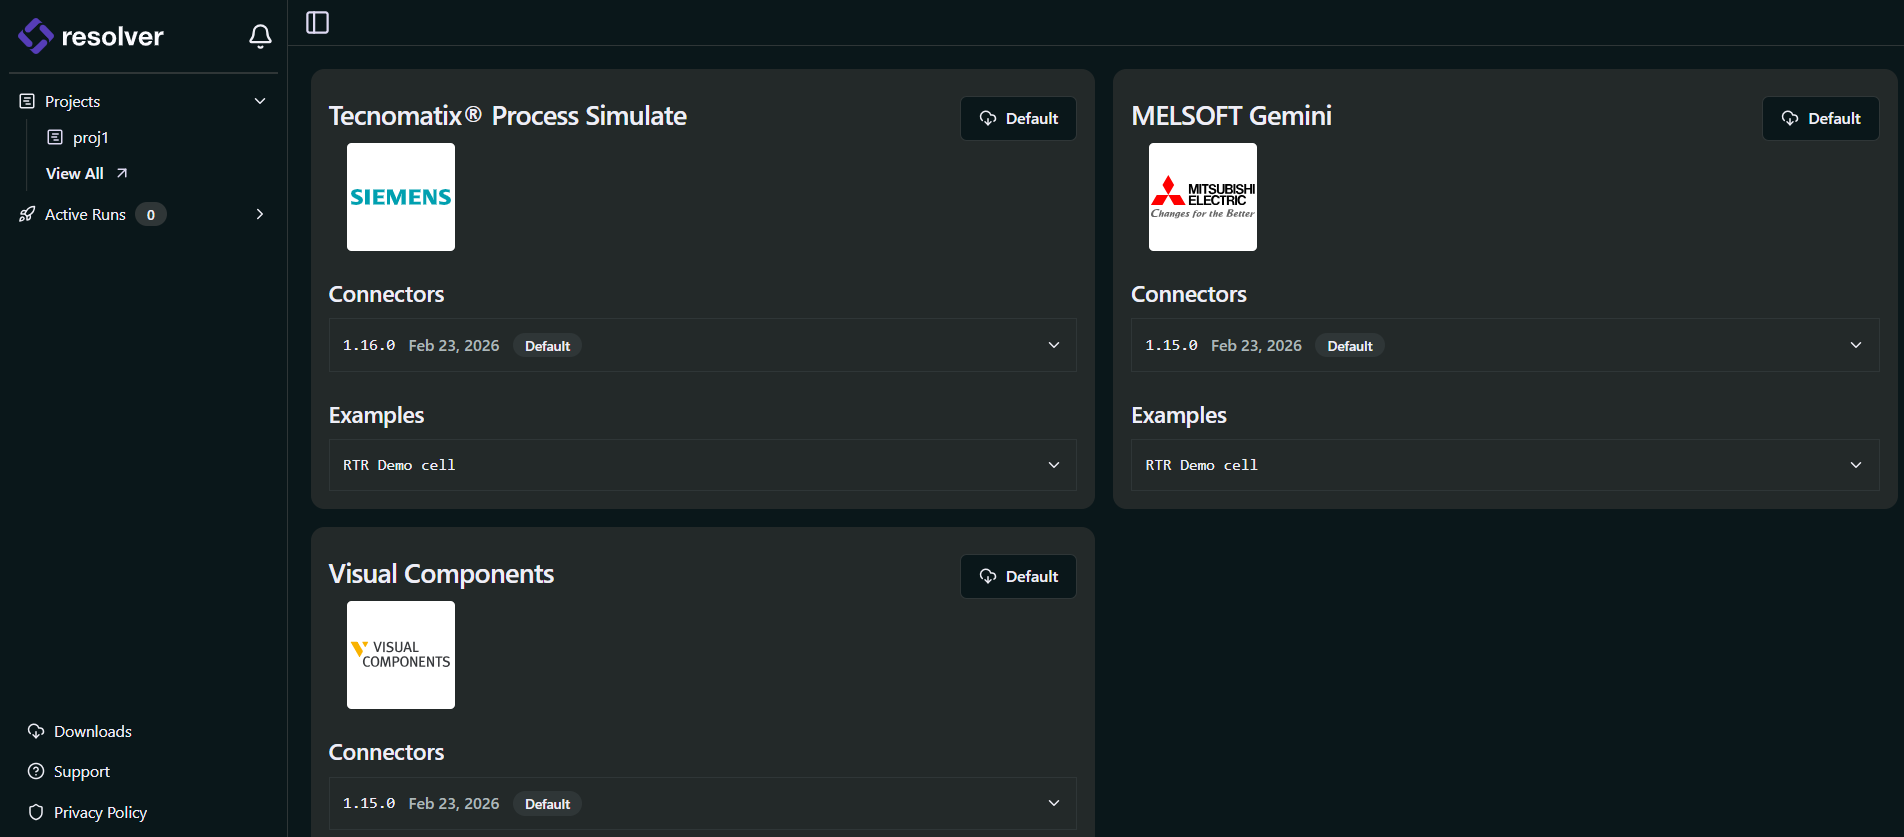
Connector の最新バージョンは、Resolver アカウントページから入手できます。Downloads ボタンをクリックしてインストーラーページに移動します。
Visual Components カードの Default ボタンをクリックして最新バージョンをダウンロードします。
ダウンロード後、Connector をインストールする方法は 2 つあります。
- Windows Installer — 推奨 の方法。
- Legacy Installation — 代替方法として DLL を手動で登録。
Windows Installer(推奨)
-
続行する前に Visual Components を閉じてください。
-
ダウンロードしたファイルを解凍し、
RTR-VC-Connectors-Setup.exeをダブルクリックしてインストーラーを起動します。 -
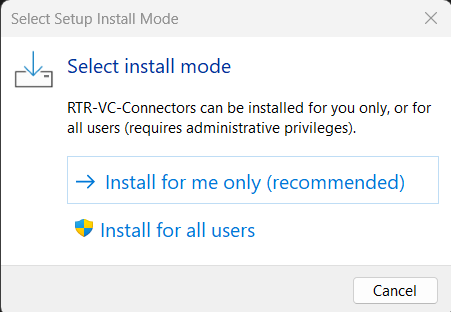
Connector を現在のユーザー用にインストールするか、すべてのユーザー用にインストールするかを選択します。
-
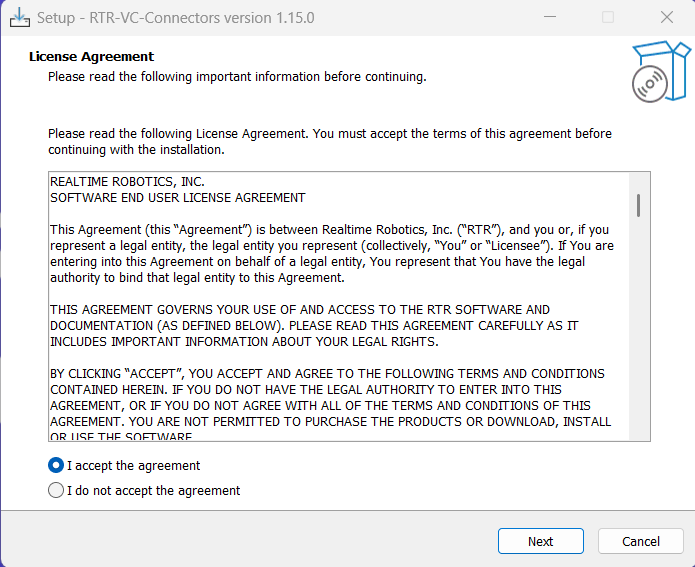
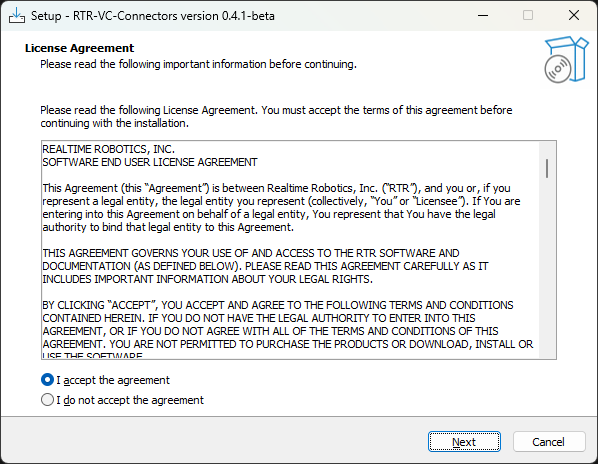
使用許諾契約を確認し、同意します。
-
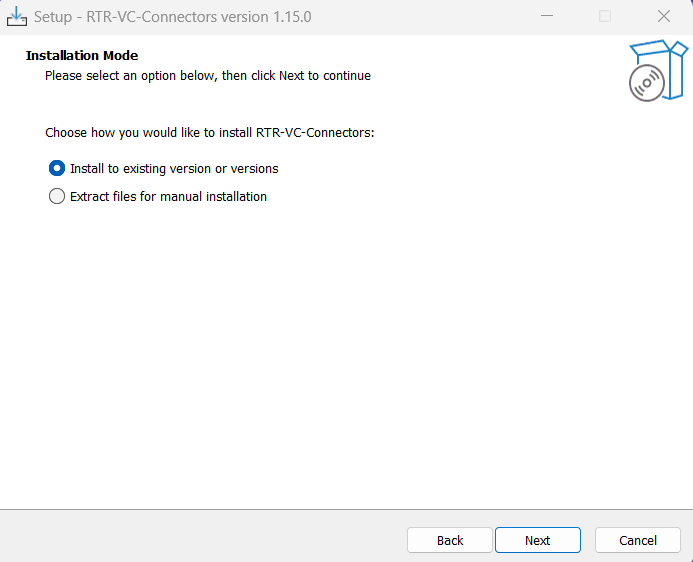
Next をクリックし、次に Install to existing version or versions を選択します。
-
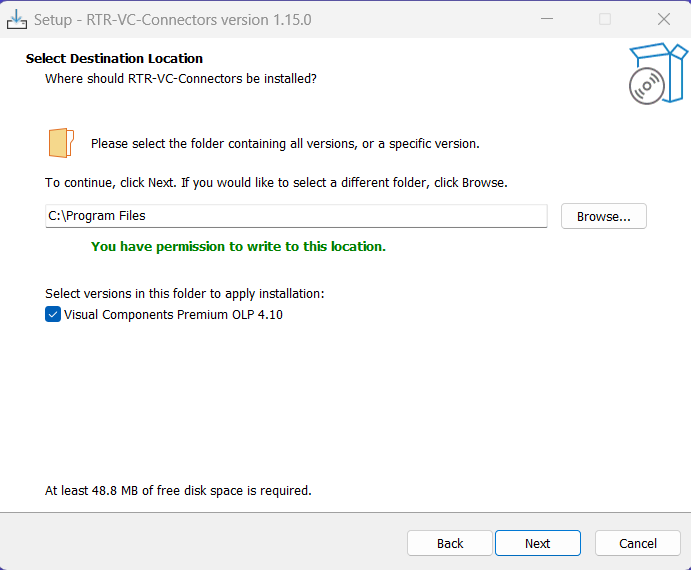
ConnectorSoftware plugins, developed by RTR, that enables the export of projects from 3rd party simulation tools such as Process Simulate and Visual Components for use with Resolver. The Connector also enables... のインストールフォルダーを選択します。デフォルト(
C:\Program Files)が推奨されます。 -
インストールする Visual Components のバージョンを選択します。
-
Install をクリックし、インストールが完了したら Finish をクリックします。
-
Visual Components を開きます。
-
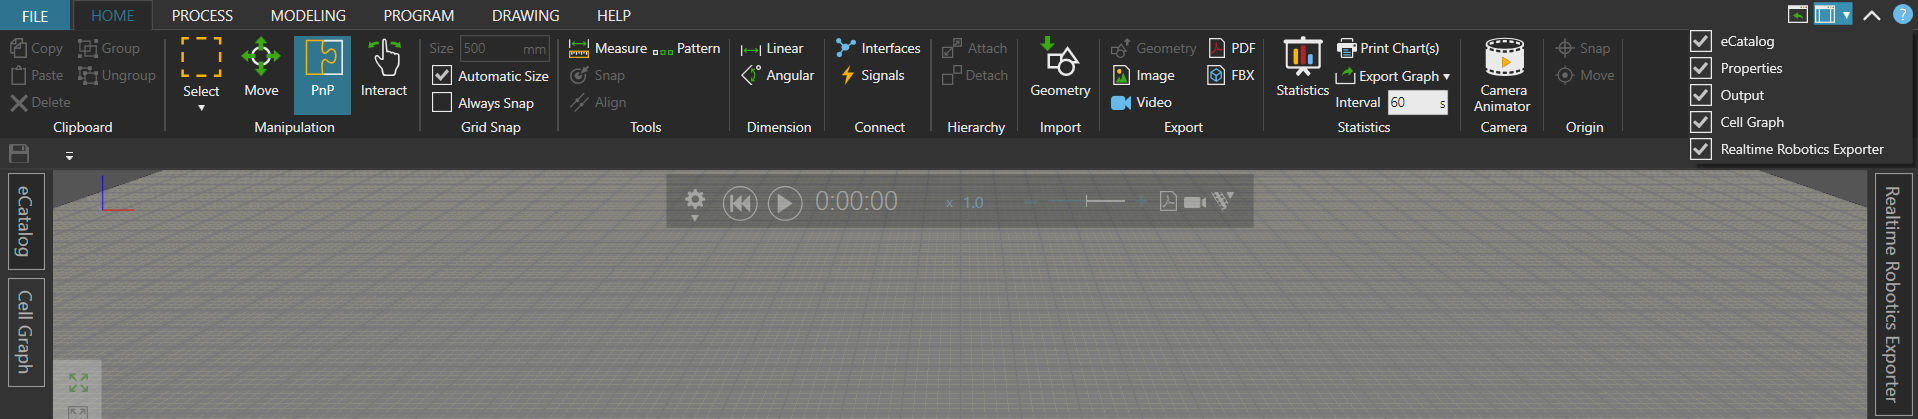
UI の右上隅にあるドロップダウンメニューをクリックします。
-
対応するオプションをチェックして Realtime Robotics Connector を有効にします。
レガシーインストール(DLL の手動登録)
DLL ファイルを Visual Components フォルダーに手動で配置する必要がある場合にのみ、この手順に従ってください。上記の Windows Installer を使用した場合、この手順は 不要 です。
-
続行する前に Visual Components を閉じてください。
-
ダウンロードしたファイルを解凍し、
RTR-VC-Connectors-Setup.exeをダブルクリックしてインストーラーを起動します。 -
Connector を現在のユーザー用にインストールするか、すべてのユーザー用にインストールするかを選択します。
-
使用許諾契約を確認し、同意します。
-
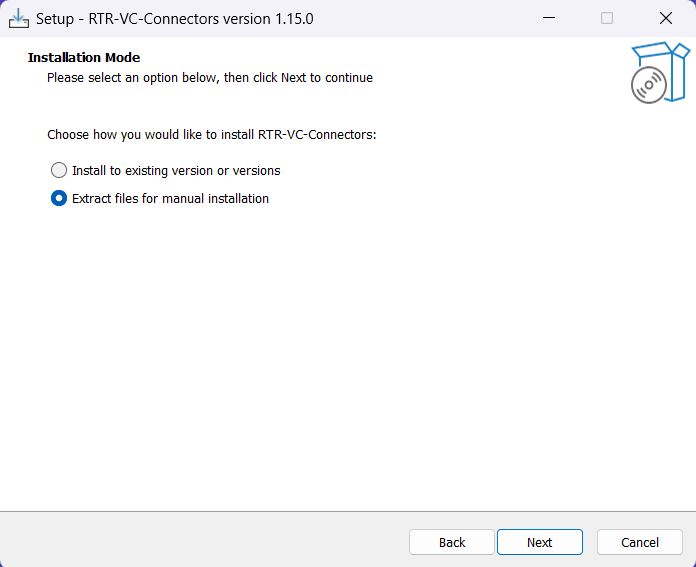
Extract files for manual installation を選択します。
-
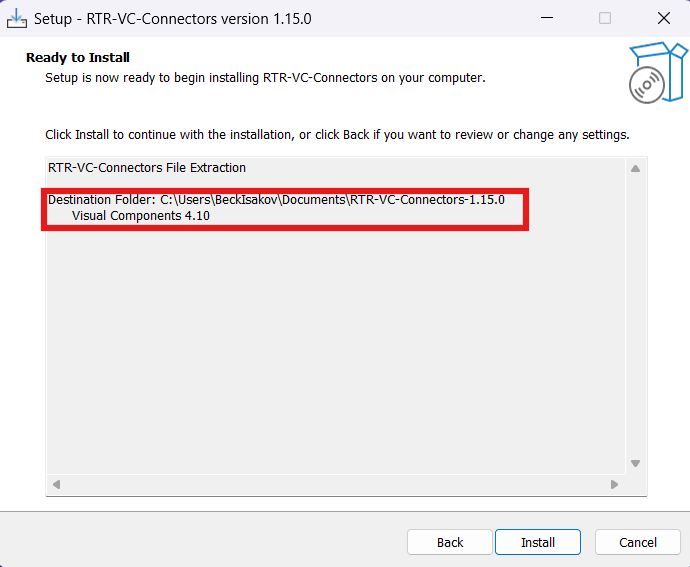
ファイルを展開するフォルダーを選択します。
-
必要な Visual Components のバージョンを選択します。
-
指定した展開先フォルダーへ移動します。
警告使用する予定の Visual Components のバージョンに対応する正しいサブフォルダーを開いていることを確認してください。Connector ファイルはバージョンごとに異なります。
-
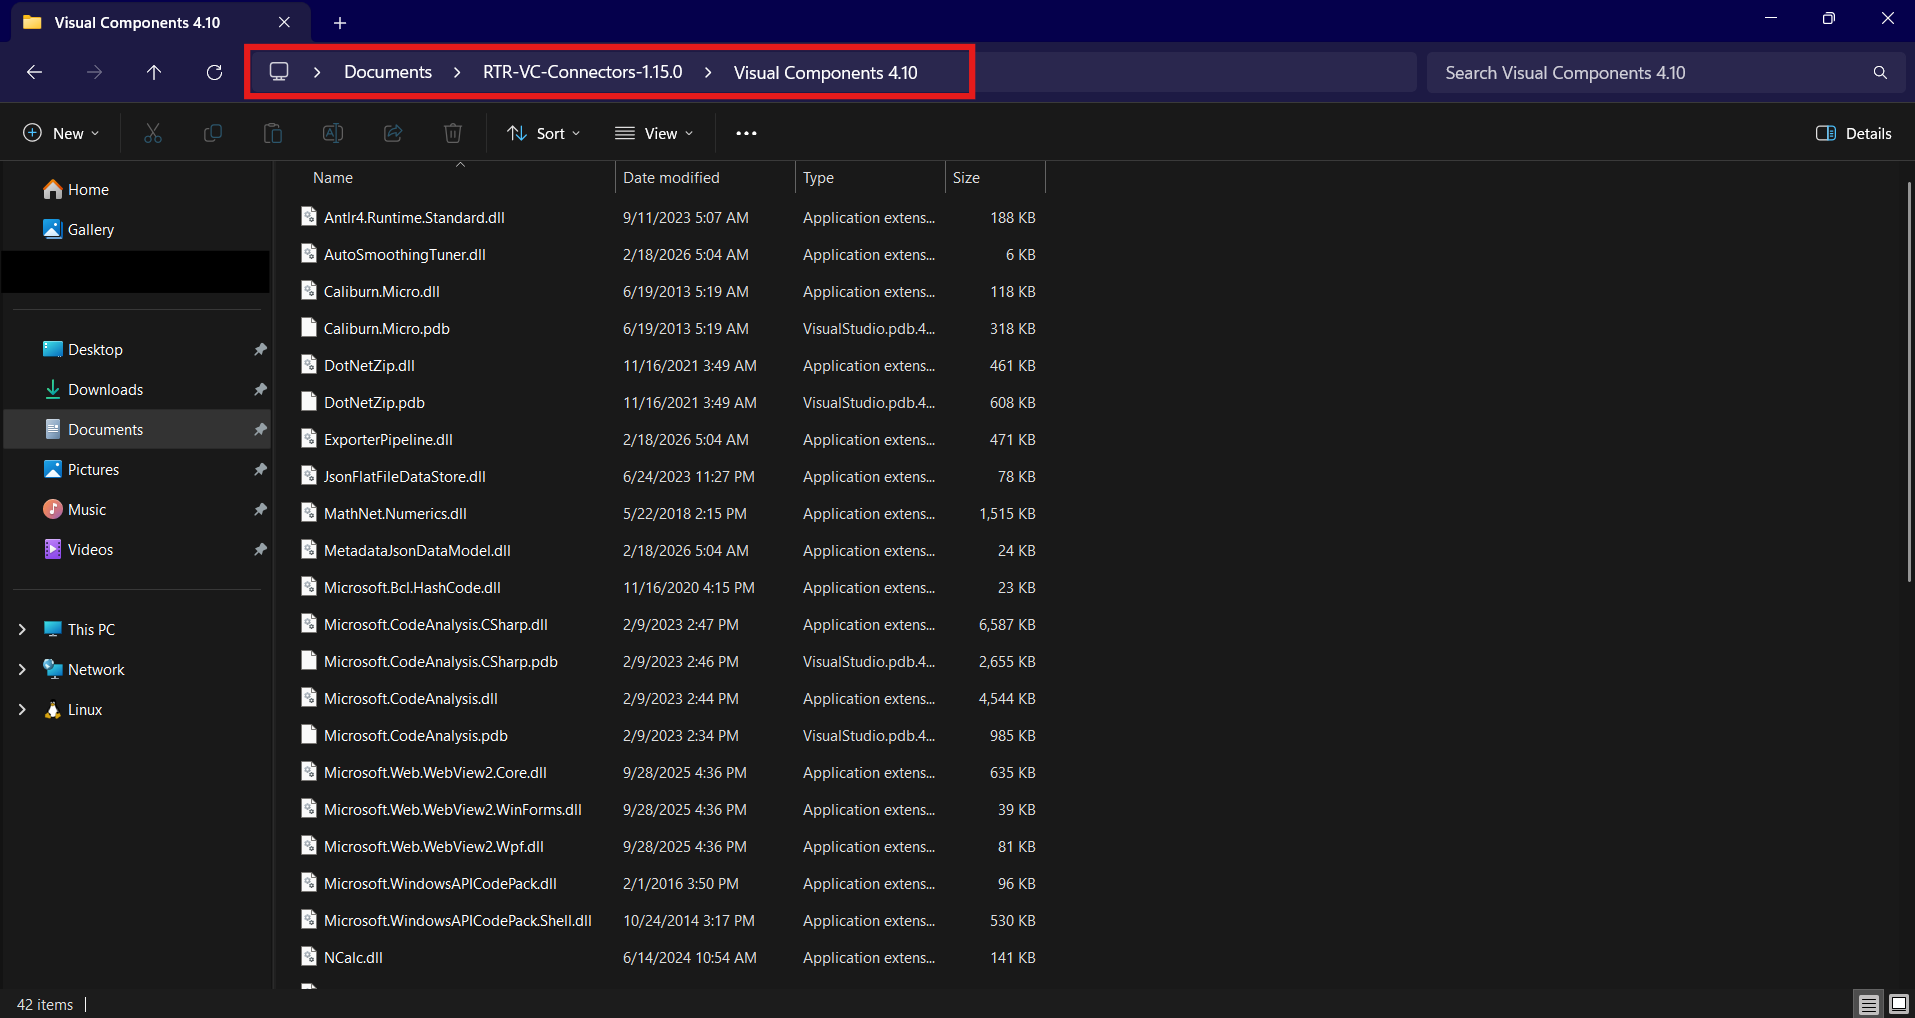
フォルダー内にすべての Connector ファイルが表示されます。
-
すべてのファイルを、該当する Visual Components のインストールフォルダーにコピーします。例:
C:\Program Files\Visual Components\Visual Components 4.10\ヒント4.10を、お使いのインストールに一致するバージョン番号に置き換えてください。 -
Visual Components を開きます。
-
UI の右上隅にあるドロップダウンメニューをクリックします。
-
対応するオプションをチェックして Realtime Robotics Connector を有効にします。