Download & Install
Get started with Resolver by downloading and installing the Gemini ConnectorSoftware plugins, developed by RTR, that enables the export of projects from 3rd party simulation tools such as Process Simulate and Visual Components for use with Resolver. The Connector also enables....
To download, please first login to your location-specific Resolver page, the click on Downloads in the bottom left.
After download, there are two ways in which a user can install the Connector. The Windows Installer is the preferred method. The Legacy Installation Process steps can be used as an alternate method.
Windows Installer (Preferred)
-
Close Gemini before continuing.
-
Unzip the downloaded file and double-click the
RTR-MELSOFT-Gemini-Connectors-Setup.exefile to install the application. -
Select whether you would like to install the PS Connector for the current user or all users.
-
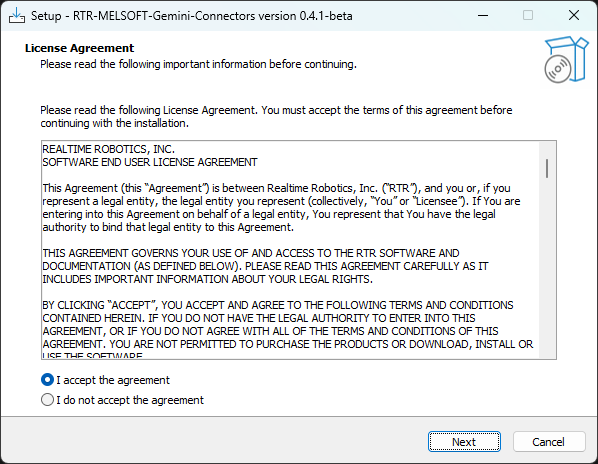
Read and accept the user License Agreement
-
After pressing "Next" select "Install to existing version or versions".
-
Select the folder to save the ConnectorSoftware plugins, developed by RTR, that enables the export of projects from 3rd party simulation tools such as Process Simulate and Visual Components for use with Resolver. The Connector also enables....
C:\Program Filesis the default and recommended folder. -
Select the versions of MELSOFT Gemini to install to.
-
Press Install and Finish after the installation is complete.
-
Open Gemini
-
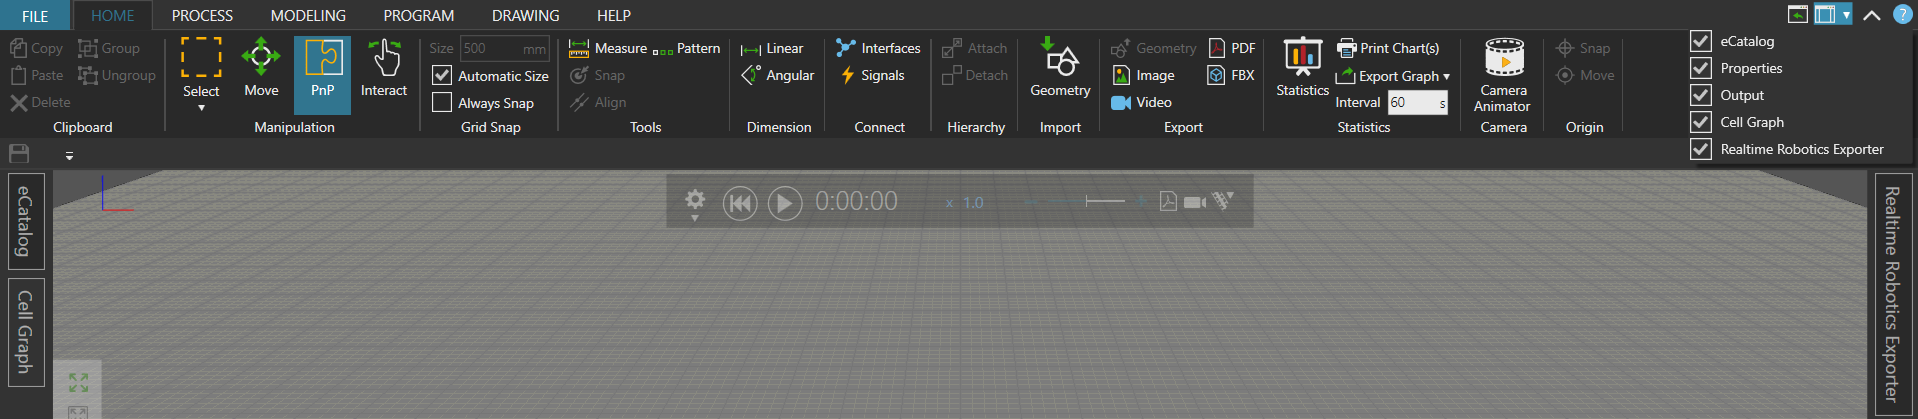
To add the Resolver panel, click the dropdown menu at the top-right corner of the UI.
-
Enable Realtime Robotics Connector by checking the corresponding option.
Legacy Installation Process (Manual registration of DLLs)
Follow the steps below to manually add the .DLL files to the Gemini folder. This is not necessary if the “Windows Installer” process was completed.
-
Close Gemini before continuing.
-
Unzip the downloaded file and double-click the
RTR-MELSOFT-Gemini-Connectors-Setup.exefile to install the application. -
Select whether you would like to install the Gemini Connector for the current user or all users.
-
Read and accept the user License Agreement.
-
Choose the folder where you want the files to be extracted to.
-
Select the Gemini versions that you want.
-
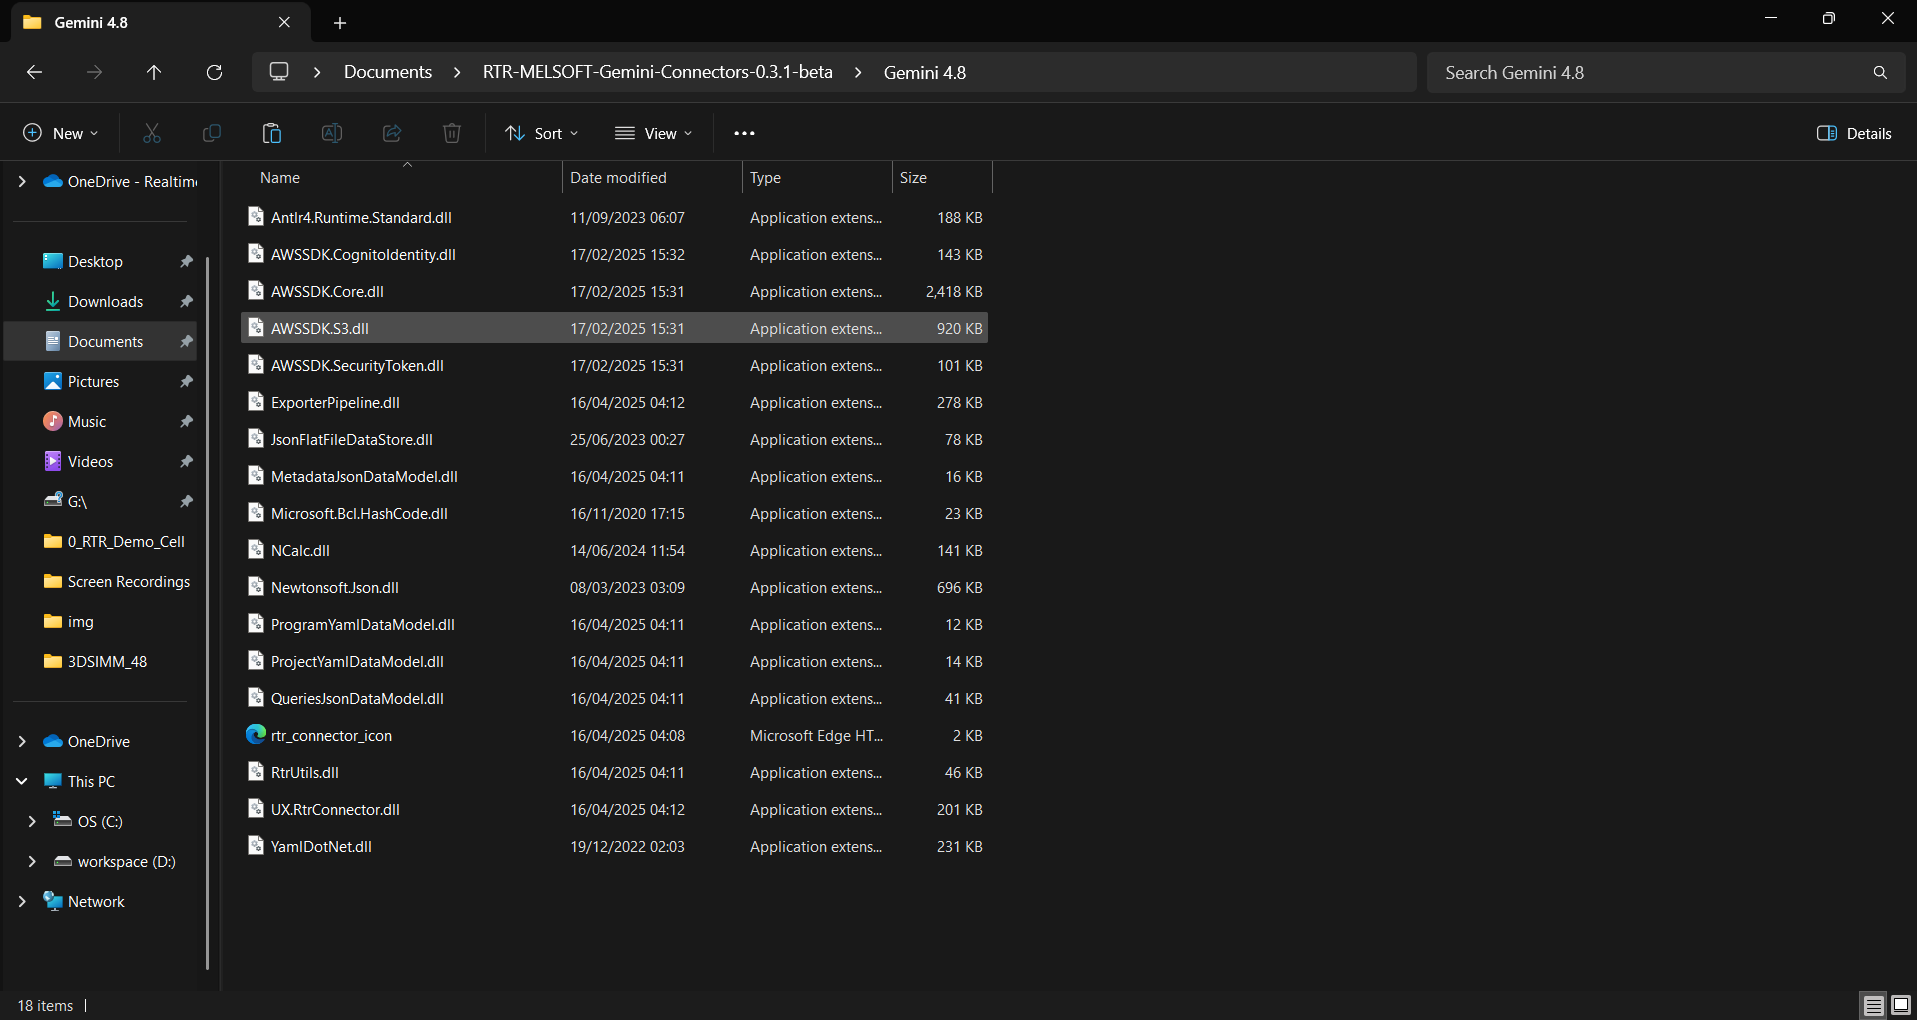
Navigate to the folder you specified for the files to be extracted
- It is important to access the correct folder for the Gemini version you want, as the ConnectorSoftware plugins, developed by RTR, that enables the export of projects from 3rd party simulation tools such as Process Simulate and Visual Components for use with Resolver. The Connector also enables... files will differ from version to version.
-
Now you have all the files of the connector.
-
Copy all the files to the appropriate installation folder:
- For Gemini:
C:\Program Files\MELSOFT\Gemini\3DSIMM_48\📌 Select the folder with the correct version-specific subfolder, such as
3DSIMM_48.
- For Gemini:
-
Open Gemini
-
To add the Resolver panel, click the dropdown menu at the top-right corner of the UI.
-
Enable Realtime Robotics Connector by checking the corresponding option.